Fax : 414-327-0577
Email: indelect@execpc.com
Catalog, Quote, Availability.
 |
Call: 414-327-1555 Fax : 414-327-0577 Email: indelect@execpc.com Catalog, Quote, Availability. |
PRINTED CIRCUIT
BOARD
instructions for using
PREMIER POSITIVE-acting Boards.
(LINK for Negative Instructions)
(LINK for "how to make
2-sided boards)
Link to Premier Boards Catalog Page
INSTRUCTIONS for USING the DATAK PREMIER series
POSITIVE ACTING PRINTED CIRCUIT BOARDS.
note that small photos may be "clicked" for large view
Premier Positive boards have a dielectric constant of 3.6 (at) 1 MHz.
POSITIVE PRESENSITIZED PC BOARDS ![]() The Method is the easiest to use of the various methods
for making a PCB. Although the negative method may cost less, the Positive method's
fewer steps and time savings more or less offset any savings in material costs.
The Method is the easiest to use of the various methods
for making a PCB. Although the negative method may cost less, the Positive method's
fewer steps and time savings more or less offset any savings in material costs.
Positive PC Boards... What are they? The boards are standard,
1 oz. copper PC boards with a Fiberglas substrate. The copper is coated with
a light-sensitive chemical that is often called a photo-resist or a
sensitizer. When this coating is exposed to enough light, the coating
will rinse away in a developer solution, exposing the copper beneath. The copper
is then etched, leaving untouched the copper pads and traces that are your circuit.
Positive boards are available in a number of sizes ranging
from 2" x 4" up to 12" X 12" and with the photo resist, or sensitizer and copper
on one or two sides.
Before use, you may want
to cut the PC board to size. The ideal cutting tool is a sheet metal shear.
Please be careful if using a paper cutter as there is a different pull and 'feel'
when cutting a board and fingers could be "dragged" into the blade and severely
injured if you do not hold the board very, very securely.
Be sure to Score the protective film
with a sharp knife on the line where you will be shearing the PC board. Or,
score it with a cut on either side of the line where it will be sheared. Scoring
the protective plastic film will prevent the plastic from pulling resist from
adjacent areas during the shearing. (Use an Xacto, or other very sharp knife
for scoring.)
NEW and big savings...
this is a fairly new and excellent enhancement for positive boards. An Ultraviolet,
or U/V, light source is not needed for exposing the Premier Series PC boards.
And note that if you were accustomed to using our older systems, you will now
mix the developer concentrate ten to one with tap water instead of the
older recipe of three to one.
EXPOSURE and DEVELOPING: 
Step 1. Work in very subdued light with no sunlight or fluorescent
light entering the room. A yellow 25 watt 'bug light" bulb provides a good
safelight; or use a low wattage (15W) incandescent bulb at a distance from the
PC Board.
Cut the PC board to size and then
remove the plastic protective cover from the PC board with a peeling motion,
rolling it back off of the resist. Roll the cover slowly, with a steady pressure.
Pulling 'up' on the film may remove some resist from the PC board.
Place the board, resist side up in a Datak
exposure frame or under a heavy piece of glass. Place your positive on top of
the sensitized coating on the PC board and sandwich the two in the exposure
frame.
The Exposure Frame: This device will
be familiar to you if you have ever made photographic prints. The frame is simply
a holder for a board and piece of glass. With your positive in place on top
of a precoated board, put the two in the frame under the glass and slide into
the frame. The frame will hold the PC board and your positive tightly together
during exposure.
Expose the PC board 
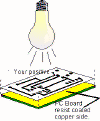
Expose the board, held in the frame,
to the light of a 100 watt white light bulb. Best results will result if the
bulb is in a hooded, reflector type lamp shade. By this, we mean the kind that
is white inside and reflects light.
EXPOSURE TIMES: A single 100
watt bulb at a distance of 12" for a ten minute exposure time is recommended
for boards up to about 6" X 6" (or smaller) in size. We suggest using a fairly
"young" bulb, one with less than ten hours of use.
Exposure for PC boards larger than
6" X 6" may require either using two bulbs, side by side (about 2" between them).
Very large boards, about 12" X 12" can be done either by exposing the two halves
of the board separately or placing three bulbs in a triangular pattern (which
can be a bit tricky). You may cover half a board with cardboard, expose for
ten minutes and then expose the other half while covering the exposed half.
Another technique for exposing larger boards is to suspend
the bulb from its power cord and let it swing in a circle for roughly fourteen
or fifteen minutes (at the 12" distance).
Develop the board: 
While the board is being exposed,
prepare a tray of developer solution. Use either Datak no. 12-402 or 12-406
liquid concentrate only. Mix the Datak developer 1 part of concentrate to 10*
parts water. NOTE: mix with warm water. A cold developer is not going to work.
The temperature should be above room temperature (about 100 to 110 degrees F)
Use glass or a plastic photographic tray
(never metal). Use just enough developer to cover the board (1/4" to 3/8" deep
is usually good). After exposing, place the PC board in the tray and rock the
tray gently until the copper is fully exposed in areas to be etched. It will
be obvious to you when the copper is bare; be sure that there is no haze or
film remaining. Rinse a developed board in cold water for a minute. Tap water
is fine. Cold water stops the process and 'sets' the resist; after immersion
in clean cold water, normal room lighting will not affect the resist further.
Etching the PC Board:

Your are now ready to etch the board. We suggest using Datak Ferric Chloride
etchant. It is messy and we warn against using this etchant in a home environment
(except out of doors) as it can stain almost anything, including counter tops,
floors etc.. Ferric Chloride is not an acid, not especially dangerous in small
amounts and is actually used in some garden fertilizers. We DO recommend
using goggles to protect your eyes from splashes. And use with good ventilation;
some people find the fumes very irritating to the throat and lungs. This author
steps into the garden to etch boards; the plants do not seem affected at all.
Disposal of expired etchant can be
done simply by flushing down a drain with a couple of minutes of cold running
water. Local Laws may require other disposal methods so please check for your
location.
Use Datak bottled Ferric Chloride
etchant or Datak powdered concentrate, which is then mixed with water following
the instructions on the package. Warm the etchant before use. (You can warm
the etchant by placing its storage bottle in a bucket of hot tap water for about
fifteen minutes.) Hot etchant works best, but warm will work. Cold etchant may
not get the job done.
You can use the etchant in a couple
of ways. One, place the etchant in your photographic tray and not too deep (never
a metal tray; use glass or plastic). Place the board, face up, in the etchant
and then agitate the tray almost constantly, including some rocking. It is important
to keep the etchant moving on the surface of the copper. Check periodically
to see if the etching is complete; be sure to etch all exposed copper. Time
varies, but you should be close to finished in not more than fifteen minutes.
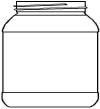
This author prefers using a large mouth plastic jar for etching.
Placing about 3/8" to 5/8" deep etchant in the jar with your PC board and placing
the lid on the jar. This permits swirling and some gentle shaking back and forth
which will etch a board very quickly. A left over jar from many foods from Cashews
to Biscotti have a large enough mouth and a plastic lid (never use a metal lid).

Monitor the etching progress by tipping the jar to see if copper has been completely removed from areas not protected by the resist. DO NOT over-etch; undercutting will occur and narrow traces and pad diameters. We expect small 2" x 4" boards and smaller to be finished in around seven minutes. The time required to etch is affected by the warmth of the etchant (warmer the better), the amount of swirling action, oxygen that gets into the solution while swirling and, of course, if the etchant is new or has been used before.
When ETCHING IS COMPLETE, you may rinse the board in a flush of tap water, dry with paper towels and proceed to drilling the pads. When you wish to remove the remaining resist, use a fingernail polish remover. Inspect the copper during drilling. (If there any breaks in lands (traces) or pads, you can bridge them with a small copper wire and solder.)
Final notes: Here are some helpful tips for users of the positive
PC boards:
1. Store used developer in a plastic or glass bottle. Plastic
is best as you may squeeze most of the air out of the bottle and cap tightly.
Do this because the developer will react, over time, with the carbon dioxide
in the air and decompose.
2. You can use the developer until it simply does not perform;
then flush it down the sink with a fast cold water chaser. Storing developer
in a refrigerator can help to keep it fresh for very long periods.
3. If the board proves to be tough to etch, you probably
did not develop it long enough and some resist residue remained behind. Or,
said residue can also be caused by too short an exposure time, too weak a light
source and so on.
4. Etchant may be reused and stored in a plastic or glass bottle;
use only a plastic (not metal) cap.
When etchant is obviously taking much too long to etch, it has expired and a
fresh batch is needed.
5. We strongly recommend that all PC board drilling be done with
a drill press. Accurate drilling with a handheld drill is nearly impossible.
Questions? Ask us at TheseusRob at Compuserve.com
or request written instructions via Uncle Sam's mail Be sure to send
your address in your request. Your email address will not be sold to anyone
else, but we may bother you with new product announcements once in a while.
end positive instructions. Link to Premier Boards Catalog Page
 |
Call: 414-327-1555 Fax : 414-327-0577 Email: indelect@execpc.com Catalog, Quote, Availability. |